Doing a lot of electronics work, one of the most frequently used tools on the workbench is a multi-tester (Figure 1). For years, I relied on a little pocket-sized unit that did everything I needed. but within the past couple years invested on a more heavy-duty version that has a stand that flips out of the back to make it stand up on its own. That’s one of those little things that I’ve realized I can’t live without. Funny how that works.
The unit comes standard with two probes (Figure 2), and while the probes have pointy ends, they’re still too big for testing a breadboard (Figure 3) when I’m prototyping. Yeah, I can usually touch them to the leads of the components, but sometimes I just want to stick ’em in a hole and use two hands to FIDDLE with the components. This is where some of that crazy inventiveness comes in. There’s a problem, and I try to come up with a solution.
I had an old, dried up ballpoint pen lying around on the desk. I took out the ink tube, and sliced off two 1″-ish sections off the end. Then, I stripped about 3″ of 22AWG wire, fed it through the empty tube, folded one end over the end of the tube, down the side of the tube, then wrapped the bejeebers out of the end sticking out the opposite end of the tube (Figure 4). Then I trimmed the excess. wire, leaving about 1/2″ of wire sticking out the bottom of each tube (Figure 5). I slid these onto the ends of my probes, wire end down (Figure 6). It was a bit of a snug fit, ensuring good contact. Had it been loose, I would have just added more passes of wire through the tube to narrow the usable diameter a little more…kind of like little shims. At any rate, the point is for the wire inside the tube to make contact along the length of the metal tip of the probe, and the end of the probe is just a wire that fits into the holes on a breadboard (Figure 7).
TIME: 15 minutes
COMPLEXITY: Beginner
COST: –
SAVINGS: $$
Figure 1
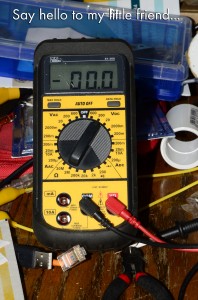
Figure 2
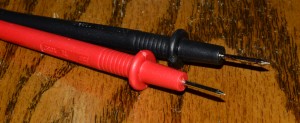
Figure 3
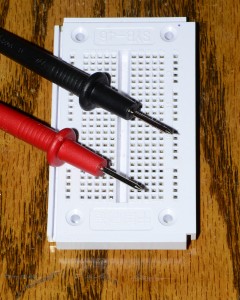
Figure 4
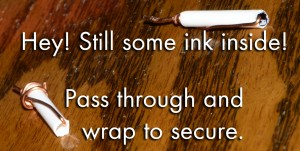
Figure 5
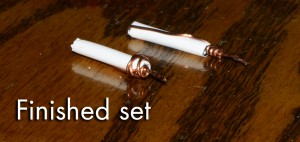
Figure 6
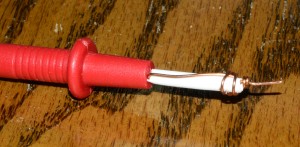
Figure 7
